Sponsored Review – MONAT Rejuveniqe Oil

Hello beauties!!

I have had a heck of a week which I will update you guys on once I’ve had a moment to rest + get myself sorted. Until then, I have a new review for you!!! Yay!!

CYMERA_20141114_225932

I was lucky enough to try out the MONAT Rejuveniqe Oil (Click here to read more about the product) + I must say, I am impressed! This product has improved my hair so so much. The product is said to help minimize thinning hair, add in needed nutrients + can promote hair growth. The oil smells nice + light but luxurious! The cap to this is a dropper which is really nice because you can control the amount of product you use…a little goes a long way (I show this in a vid on my instagram).  The packaging looks amazingly sleek + chic + just really draws your eye to it! Definitely a beautiful high end goodie you must try out!!!!

HOW I USE IT:

CYMERA_20141114_230111

After I wash my hair, I pat dry really well with a town then apply some leave in conditioner, After .I brush/comb my conditioner through, I add in the oil to my ends and then I massage it into my scalp. After those steps, I just let my hair air dry + once it does…OMG, my hair is so so soft + shiny. BEAUTIFUL!!

MY OVERALL THOUGHTS:

5-stars Rilakkuma

I totally give this product a 5 out of 5 because not only did I see instant result after my first use (and still to this day), but I have seen growth as well + that’s major for me since I’ve been trying to grow my hair out + for a bit it grew then just stalled but this definitely gave it that extra boost to start growing again. Oh + I forgot, you can use this on your body as well!! The only con I think of at the moment is the price. On the website this product retails for $99!! That’s a lot of money but if you want to splurge….DO IT!! Hahahaha. All in all, I am happy with this product + once I’m out I will probably purchase this again + try more of the MONAT products as well.

I hope this was informative for you + I will be back soon with more post so stay tuned!!

Until Next Time…

♥ Kai

Tips + Tricks #1 – Goodbye Ingrown Hairs, Hello Sexy Legs!!!!

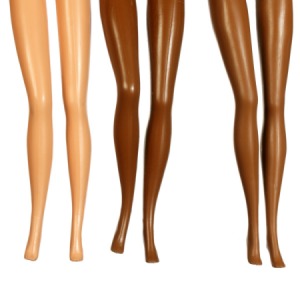
barbie_doll_leg_s1

Ingrown hairs are basically the Devil in disguise! I’m telling you, they hurt + are just so darn nasty!! I am blessed to be a natural curly haired girl + for as long as I can remember, I have had issues with ingrown hairs after shaving. Some people may say, “Just wax” or “Use a chemical hair remover”! I absolutely appreciate the suggestions but those options just DO NOT work for me. My skin is always left behind so irritated + for the bikini area….well….it’s not pretty! LOL

If you haven’t read my blog post about the Bliss Ingrown Hair Pads, you probably don’t know that those things about killed me! Hahaha, my skin was much too sensitive for them so I have been on a hunt to find a method that works for me + by Jove I think I’ve got it!! I am going to share with you what I do to obtain a close shave and keep ingrown hairs at bay!

WHAT YOU WILL NEED:

1. A cleanser or Mask that contains salicylic acid.

mask

2.  Exfoliating Gloves

bath gloves

3. Bikini Zone Anti Bumps Shave Gel

bikini zone

4. A 5 blade razor

5 blade razor

5. Argan Oil or some type of pure oil for the body.

argan oil

6. A Body Butter

body butter

STEPS:

1.  The first thing I did was research what kind of things help ingrown hairs + salicylic acid popped up. I thought that this would  be something awesome to try because it was something I had in my home already. I had a mask with salicylic acid in it and an exfoliating cleaner, so for a week (without shaving) I cleansed my legs with the cleanser and the day before, I used the mask on my legs (left on for 15 minutes while relaxing and wearing a face mask). I washed the mask off,  pat dried my legs + moisturized them.

2. On the day that you decide to shave, when you jump into the shower, wash the rest of your body and then use your exfoliating glove (and your favorite body wash) to gently exfoliate your le gs to help loosen the hairs + to remove any dead skin cells.

3. Next I apply the Bikini Zone gel to my legs + let it set for a moment. This product really works + helps to keep my skin irritation free…in all areas, including under the arms. Once that has set for about a minute or 2, I use a 5 blade razor. Man, a razor like this is magic!! I swear it gets all the hair + I highly recommend  them!

4. After you have shaved every area that needs it, gently exfoliate your legs/necessary area again. I have read that people actually shave a second time but that is up to each individual + not part of my actual routine.

5. Once out of the shower, pat dry your skin. You want to care for your skin not damage it! when your skin is still a bit damp, mix the oil of your choice together with the body butter, cream, or moisturizer of your choice and smooth onto your legs. Your skin should feel amazing after this!!

I love wearing silky or satin PJ’s after shaving my legs because they feel so smooth + silky! I always get compliments from the bf on how smooth my skin is and it’s because I take the time to care for it. You have to relax sometimes and this is a wonderful way to unwind + enjoy some time away from the busy world we are all a part of!

I hope you guys enjoyed this tip so please feel free to comment below + share this with someone who might be looking for a solution to this common problem! I will see you in the next post!!

Until Next Time…

LOVE, PEACE, + SHOPPING RECEIPTS!!

 Kai

How I take care of my Human Paws ;)

Hello! This video is explaining how I take care of my nails and what I do to help them grow. Please adjust your volumes because I have a new camera and I’m still figuring everything out so the sound is a bit dodgy. If you have any questions, please leave them below. Thanks and I hope you find this helpful.


Kaiotee ❤
   xx


Replenix Eye Repair Cream Review

(*Disclaimer: Brand Description and ingredients were copied from the Beautyfix website. Additional information and full size price were copied from the Dermstore website*)
Hello everyone and Happy 2012!! I am back +  I can not wait to share some great beauty finds with you! Today I am reviewing an awesome eye cream that I was sponsored via Beautyfix.com. They were kind enough to let me try their services and I must say I love it!! Here is the link to my video un-boxing my items! It’s actually just a few post down. Now. moving on to the review…..
 
My Before + After Photo
 
 
As you can see from the photo, the before + after shots are drastically different! This change was after using  the Replenix eye cream for about a week. I was shocked at the results because my under eye area has always been puffy + fine line have always been there. It is all hereditary! I felt the eye cream wouldn’t make much of a difference because nothing else had + yeah, I was totally wrong!
 
The formula is smooth + melts into the skin quickly. It first comes out of the tube like a cream then dissolves away like water.  After about 15-20 minutes you (or at least I did) will notice your eye area looks completely different. it’s brighter, no bags, + looks tighter, firmer.
 
The Products
 
Sample Sixe Product from Beautyfix.com
 
Full Size Product from Dermstore.com
 
 
 Product Information
 

Sample from: http://www.beautyfix.com


Full size: http://dermstore.com


Full size Cost: $67.50 (0.5fl oz.)


Brand Description: Replenix Eye Repair Cream is an advanced wrinkle-fighting treatment that produces a luminous eye area with diminished fine lines and wrinkles. It is formulated with 90% green tea polyphenols to neutralize free radicals and vitamin K and arnica to diminish dark circles. Cooling cucumber soothes your delicate eye area as vitamin E nourishes.
 
Ingredients: Purified Water, Glycerin, Glyceryl Dilaurate, Acrylates Copolymer, Acrylates/Steareth-20, Methacrylate Copolymer, Octyldodecyl Stearoyl Stearate, Caprylic/Capric Triglyceride, Glyceryl Acrylate/Acrylic Acid Polymer, Propylene Glycol, Cacrocystis Pyrifera (Kelp) Extract, Glyceryl Stearate, Camellia Sinensis (Green Tea) Polyphenols, Myristyl Myristate, Myristyl Laurate, Retinol, Tocopheryl Acetate, Hesperidin Methyl Chalcone, Sodium Hyaluronate, Pinanediol, Camphanediol, Dipeptide-2, N-Hydroxysuccinimide, Chrysin, Palmitoyl Oligopeptide, Palmitoyl Tetrapeptide-7, Phytonadione (Vitamin K), Silybum Marianum Fruit Extract, Sodium PCA, PEG-100 Stearate, Polysorbate-20, Phospholipids, Hydrolyzed Wheat Protein, Phyllanthus Emblica Fruit Extract, Cetyl Alcohol, Myreistyl Alcohol, Lauryl Alcohol, Behenyl Alcohol, Palmitic Acid, Stearic Acid, Lecithin, Ascorbic Acid, Arnica Montana Powder, Polyacrylamide, C13-14 Isoparaffin, Laureth-7, Steareth-20, PVP, Butylated PVP, Caprylyl Glycol, Ethylene Brassylate, Phenoxyethanol, SOrbic Acid, Sodium Hydroxide, Disodium EDTA.
 
 
Additional information: 
 
Treats These Conditions: Firmness, Free Radical Protection, Anti-Aging, Dark Circles, Fine Lines & Wrinkles
 
Suitable For These Skin Types: All
 
Ingredient: Retinol (Vitamin A), Antioxidant, Peptides , Green Tea
 
Skin Care: Eye Creams and Gels, Press Picks Skin Care
 
Features: Fall 2011 Catalogue Boutique, Skin Care Awareness, Winter Catalogue 2011
 
Application Area: Eye Area
 
Physician Strength: Medical Grade


My Overall thought + Pros/Cons


Overall, I love this product + plain to buy it. My Pros outweigh my cons lol but I will still share them.


Pros: Light formula, absorbs into the skin quickly, great for my oily/Combination + sensitive skin, results appear quicky, this item (if available) can be tried before bought through the Beautyfix website, tightens the skin around the eye, reduces fine line + brightens the eye area.


Cons: A bit on the pricey side (but so worth it) + not available in stores (at least to my knowledge).


I hope you enjoyed this review + definitely try to get your hands on this product! It does wonderful things for your sensitive eye area + is now a staple in my skincare routine!!


Love you much,


Kaiotee
  xx